
Staring down a tin of matcha and a bamboo whisk for the first time can feel like standing at the base of a mountain with no map. You know the bright green powder is supposed to turn into something smooth and frothy, but between sifting, water temperature, and whisking technique, it’s easy to end up with a clumpy, bitter mess instead. Learning how to make matcha the traditional way solves that problem by giving you the exact sequence Japanese tea culture has refined for generations.
This guide skips the milk and sweeteners for now and focuses on usucha, the classic thin-tea method that’s the foundation of everything else matcha-related. We’ll walk through the tools you actually need, the step-by-step process from bowl to whisk, and the fixes for the three mistakes that trip up almost every beginner. Coffeetori put this together for home brewers who want the real technique, not just another recipe card.
By the end, you’ll know exactly how much matcha to scoop, how hot your water should be, and how to whisk so your matcha turns out silky instead of gritty. Let’s get your bowl warmed up.
Key Takeaways
Sift your matcha every single time you brew it, since even fresh powder compacts into stubborn clumps within days of opening the tin.
Keep your water hot, not boiling. As a general rule of thumb, around 175°F works well for traditional matcha.
Whisk in a brisk “M” or “W” motion instead of stirring in circles, since that’s what actually creates fine, even foam.
For traditional style, use about one teaspoon (roughly 2 grams) of matcha to 2 ounces of water as your starting ratio.
Clumping, bitterness, and flat foam almost always trace back to one of three fixes covered later in this guide.
Table of Contents
- What Do You Need To Make Matcha The Traditional Way
- How To Make Traditional Matcha, Step By Step
- Common Matcha Mistakes (And Quick Fixes)
- Want It Creamier? Try A Matcha Latte
- The Takeaway
- Frequently Asked Questions
- 6.1 How Much Matcha Powder Should I Use For One Cup?
- 6.2 Can I Make Matcha Without A Bamboo Whisk?
- 6.3 Do I Really Need To Sift Matcha Every Time?
- 6.4 Is Thick Foam Always Better Than Light Foam?
- 6.5 How Long Does Prepared Matcha Last Before It Goes Flat?
- 6.6 What’s The Difference Between Usucha And Koicha?
What Do You Need To Make Matcha The Traditional Way
Making traditional matcha the right way starts with four simple tools rather than any fancy equipment or special skill, as outlined in a beginner’s step-by-step matcha guide covering the essential tools and techniques. Each one exists to solve a specific texture problem, whether that’s giving the whisk room to move or breaking up powder before it ever touches water. None of these tools are expensive, and if you’re missing one, a household substitute will usually get you close enough to start practicing today.
The Core Tools You’ll Actually Use

| Tool | Purpose | Substitute |
|---|---|---|
| Chawan (matcha bowl) | Wide, shallow shape lets the whisk swing freely without splashing | Any small, wide bowl or deep cup |
| Chasen (bamboo whisk) | Creates fine foam; won’t shred delicate tea particles | Not recommended, metal whisks flatten texture |
| Chashaku (bamboo scoop) | Measures roughly 2 grams per serving | Standard measuring teaspoon |
| Fine mesh sifter | Breaks up clumps before powder meets water | A small tea strainer works in a pinch |
The chasen is the one tool worth not skimping on. Metal whisks simply can’t create the same fine foam, and they can shred the delicate tea particles instead of aerating them. A fine mesh sifter, meanwhile, handles the step most beginners skip and instantly regret.
Any small, wide bowl or deep cup works if you don’t own a chawan yet, as long as there’s room for the whisk to move without hitting the sides constantly.
A standard measuring teaspoon is nearly identical to a chashaku scoop, so there’s no need to buy specialty tools before your first cup.
If you’re still deciding which bamboo whisk to buy, our dedicated whisk buying guide breaks down tine count and price ranges in more detail.
How To Make Traditional Matcha, Step By Step
The traditional matcha method follows a strict order: warm the bowl, measure and sift the powder, add water at the right temperature, then whisk until smooth and foamy. Skipping or reordering any of these steps is usually what separates a gritty, bitter cup from one that tastes bright and grassy the way it should. The whisking motion in particular is what takes practice, but once your wrist gets the rhythm, the rest becomes second nature.
Step 1: Warm Your Bowl And Measure Your Matcha
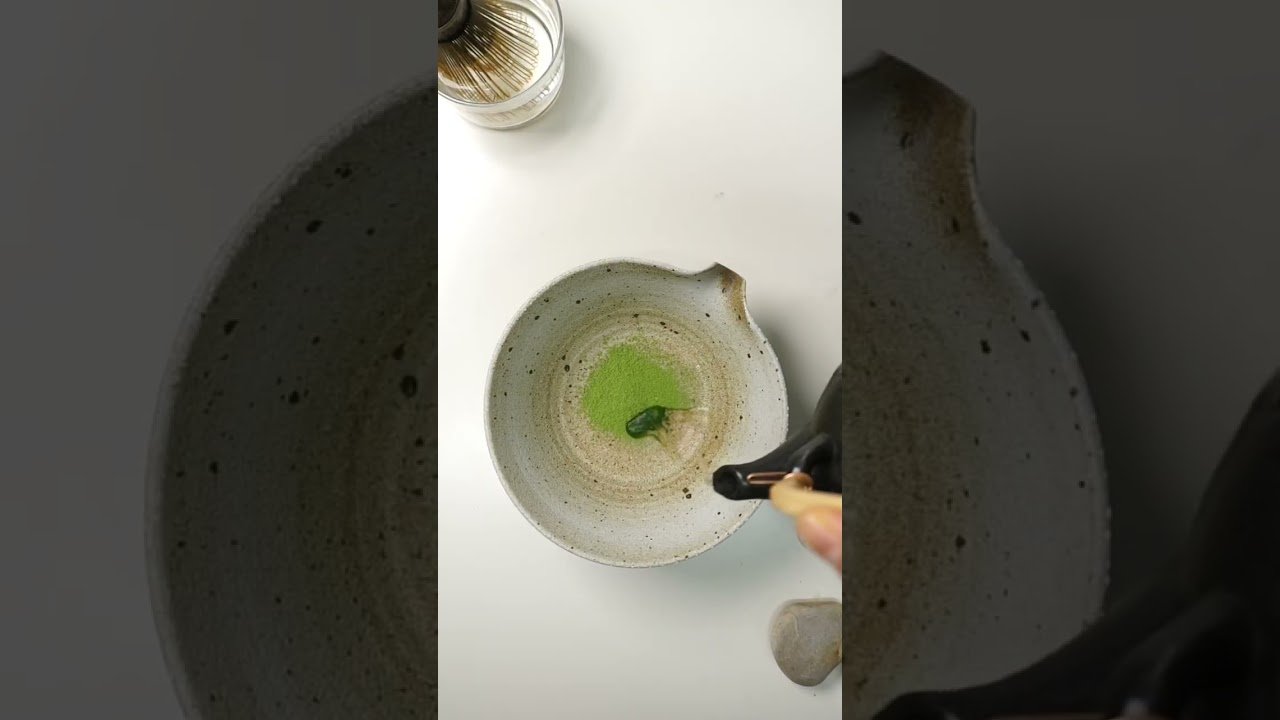
Swirl a small amount of hot water around your chawan, then dump it out and dry the bowl completely before adding any powder. This keeps your finished matcha warmer for longer once it’s whisked. Measure about one teaspoon, or roughly 2 grams, of matcha using your chashaku or a regular teaspoon.
Step 2: Sift Before You Do Anything Else

Press your measured matcha through a fine mesh sifter directly into the dry, warmed bowl. This step is non-negotiable, even for experienced brewers who’ve been making matcha for years. If you’re unsure whether you’re working with ceremonial or culinary grade powder, our Matcha 101 guide breaks down how each grade behaves once sifted.
Step 3: Add Water At The Right Temperature
Pour about 2 ounces (roughly 70 milliliters) of hot water into the bowl with your sifted matcha. As a general guideline, around 175°F tends to work well for traditional matcha, since it’s noticeably cooler than boiling, treat that number as a starting point rather than a fixed rule, similar to the water temperature guidance covered in a detailed matcha brewing walkthrough. If you don’t own a thermometer, just let a freshly boiled kettle sit for seven to ten minutes before pouring. Stir gently first to knock out any obvious lumps before you start whisking in earnest.
Step 4: Whisk In An “M” Or “W” Motion

Whisk briskly from the bottom of the bowl upward, tracing an “M” or “W” shape with your wrist and forearm rather than stirring in lazy circles, a technique also detailed in a guide to brewing matcha the traditional way. Circular motions just spin the tea around without incorporating enough air, so stick to the zig-zag pattern even if it feels awkward at first. Keep going until a fine, creamy foam covers the surface, then slow down and sweep the whisk across the top to pop any oversized bubbles. Finish by lifting the whisk slowly from the center of the bowl, leaving a small peak behind.
Foam thickness is genuinely a matter of preference rather than a hard rule. Some Japanese tea schools favor a thin, delicate layer of foam, while others chase the thick, champagne-like froth that’s become popular in photos online. Neither approach is more correct than the other, so don’t stress if your first few cups look different from what you’ve seen elsewhere.
Common Matcha Mistakes (And Quick Fixes)

Most beginner matcha problems fall into just three buckets: clumping, bitterness, and flat foam that refuses to form. Each one has a clear, identifiable cause, which means each one also has a fast fix you can apply on your very next cup. Once you know what’s actually going wrong, troubleshooting matcha stops feeling mysterious and starts feeling like basic cause and effect.
Why Is My Matcha Clumpy?
Clumping almost always comes from skipping the sifting step or from powder that’s absorbed humidity while sitting in a poorly sealed tin. The fix is simple: sift every time, no exceptions, and store your matcha in an airtight container away from heat and moisture. A few extra seconds with a sifter saves you from picking gritty bits out of your teeth later.
Why Does My Matcha Taste Bitter?
Bitterness usually means your water was too hot when it hit the powder, scorching the delicate leaf particles in the process. As a general rule, let boiled water cool until it’s hot rather than scalding before you pour it over your sifted matcha. It’s also worth checking freshness, since old, stale matcha can taste flat or oddly sour no matter how carefully you brew it.
Why Won’t My Matcha Foam Up?
Flat foam is often a whisk problem rather than a technique problem, especially if your chasen’s tines have gone stiff or brittle with age. Soak the tips in warm water for a minute before whisking, and make sure you’re using that brisk “M” or “W” motion instead of slow circles. Also remember that some traditional styles intentionally favor lighter foam, so a thinner layer isn’t automatically a sign you did something wrong.
Want It Creamier? Try A Matcha Latte
Once the traditional method starts feeling natural in your hands, a matcha latte is really just one small step further, not a completely different skill. You’re still sifting the same powder and whisking it into a smooth paste; the only real difference is that you’re pouring it over steamed or frothed milk instead of drinking it straight from the bowl. Think of it as the next experiment once your wrist has the whisking motion down, rather than a shortcut that replaces what you’ve just learned.
If you want the full milk-frothing steps, ratios, and iced variations, our complete latte recipe guide walks through the process from start to finish. It’s a natural next stop once usucha feels comfortable and you’re ready to play with flavor.
The Takeaway
Traditional matcha looks intimidating on paper, but it really comes down to three habits: sift every time, keep your water hot rather than boiling, and whisk in that brisk “M” or “W” motion instead of stirring in circles. Nail those three things and everything else, including foam thickness and flavor balance, starts falling into place with practice rather than perfection on day one.
Give yourself permission to mess up your first few cups — even experienced tea drinkers needed repetition to get their wrist motion right.
Once usucha feels like second nature, trying a matcha latte is a fun and easy way to see the same skills applied in a creamier, more familiar format.
Frequently Asked Questions
Here are quick answers to the questions beginners ask most often about brewing matcha the traditional way.
How Much Matcha Powder Should I Use For One Cup?
For traditional style, use about one teaspoon, or roughly 2 grams, of matcha per serving. Flavored or blended matcha typically calls for a bit more powder to balance the added sweetness against the tea’s natural vegetal notes.
Can I Make Matcha Without A Bamboo Whisk?
You can technically use a fork or a small electric whisk in a pinch, and it will still dissolve the powder. Neither creates the same fine, stable foam as a chasen, though, so bamboo remains the gold standard for texture.
Do I Really Need To Sift Matcha Every Time?
Yes, even matcha you opened five minutes ago can have small clumps from settling during shipping or storage. Sifting takes just a few seconds and is the fastest, most reliable way to avoid a gritty cup.
Is Thick Foam Always Better Than Light Foam?
No, foam thickness is really a matter of tradition and personal taste rather than a strict quality marker. Some Japanese tea schools intentionally aim for light foam, while others favor the thicker, more visually dramatic style.
How Long Does Prepared Matcha Last Before It Goes Flat?
Matcha is best enjoyed immediately after whisking, since its foam and vibrant flavor start fading within just a few minutes. If it sits too long, the tea can separate and take on a flatter, less vibrant taste.
What’s The Difference Between Usucha And Koicha?
Usucha, or thin tea, is the everyday method covered throughout this guide and the one most home brewers should start with. Koicha, or thick tea, uses double the matcha and half the water, creating a dense, paste-like texture reserved for higher-grade matcha.


